
This guide sets up a scheduled Excel report that RBS Report sends by email. It builds on a report you have already defined from a SQL Server table, as in step 5 of our guide on logging OPC UA data to SQL Server. The steps follow RBS Report V3.0 on a Windows PC. We filled the forms with placeholder values (smtp.example.com, [email protected]) and did not send a real email, so this guide shows the settings and what the program does, not a received message. "In our setup" marks what we saw on screen.
What you need
- A report defined on the Excel Reports page of the Configuration program: folder, name, Excel template, data source and cells.
- The details of an SMTP server that will accept the mail.
- A Windows PC that stays on. A Windows service called RBSMailService runs the jobs.
1. Choose the date column of the report
A scheduled report needs to know which column holds the time of each row. On the Excel Reports page, open the report and set the Date column under Report period. In our setup it was RealDate. Then choose how to read that time: as local time with a time zone, or as UTC. While the setting is "Unknown", the report cannot be scheduled.
2. Enter the SMTP settings
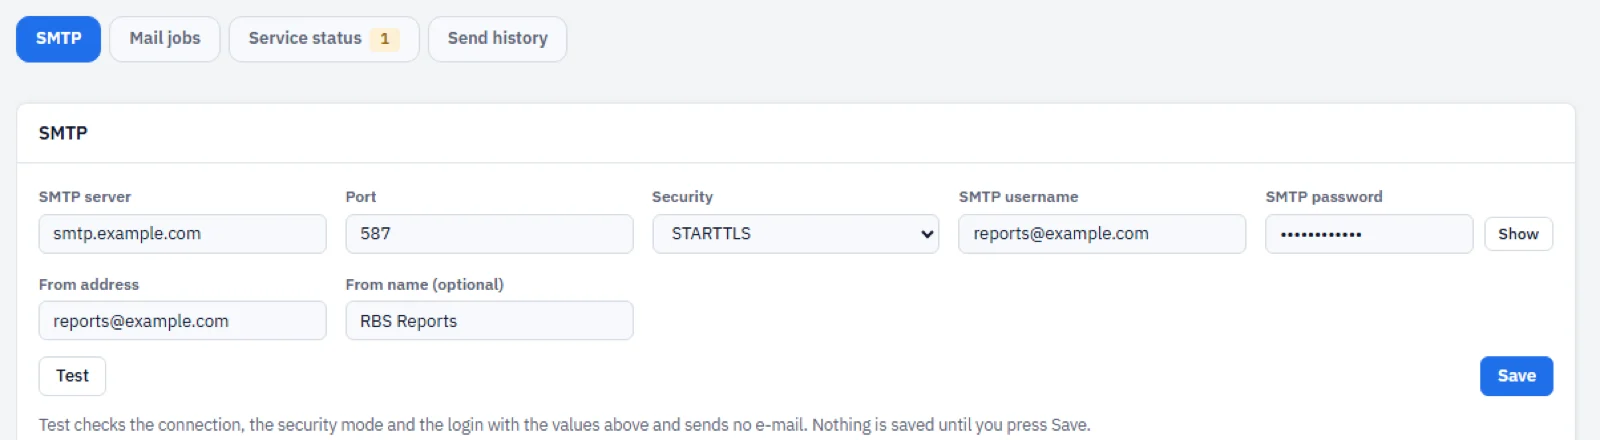
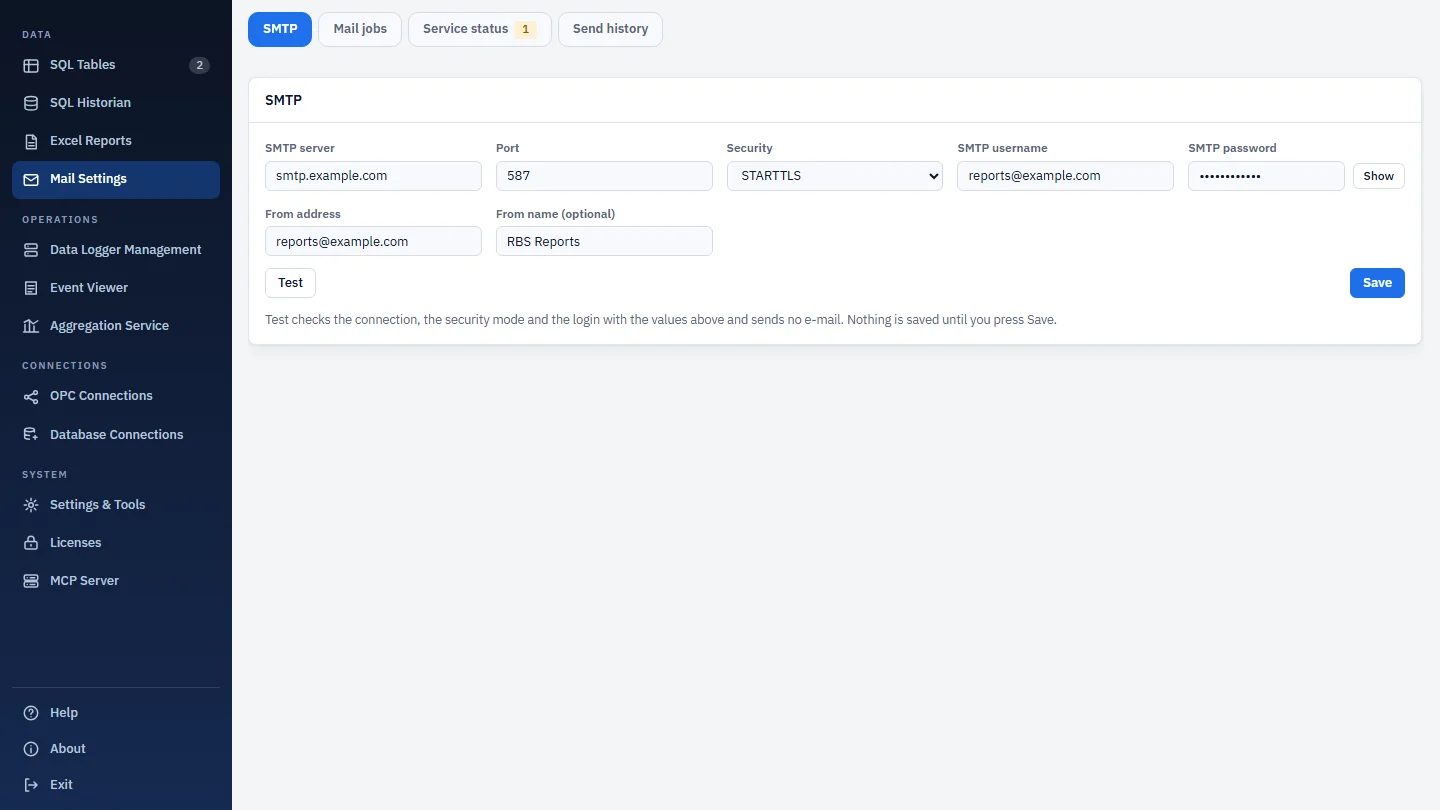
Open Mail Settings and stay on the SMTP tab. The fields are:
- SMTP server and Port. The port defaults to 587.
- Security: None, STARTTLS or implicit TLS.
- SMTP username and SMTP password. The username can stay empty if your server relays without a login, but a username is only accepted with TLS. Windows DPAPI encrypts the password, and the program does not write it to a settings file.
- From address, and an optional From name.
Select Test to check the connection, the security mode and the login with the values on screen. The test sends no email, and nothing is saved until you select Save.
3. Create the mail job
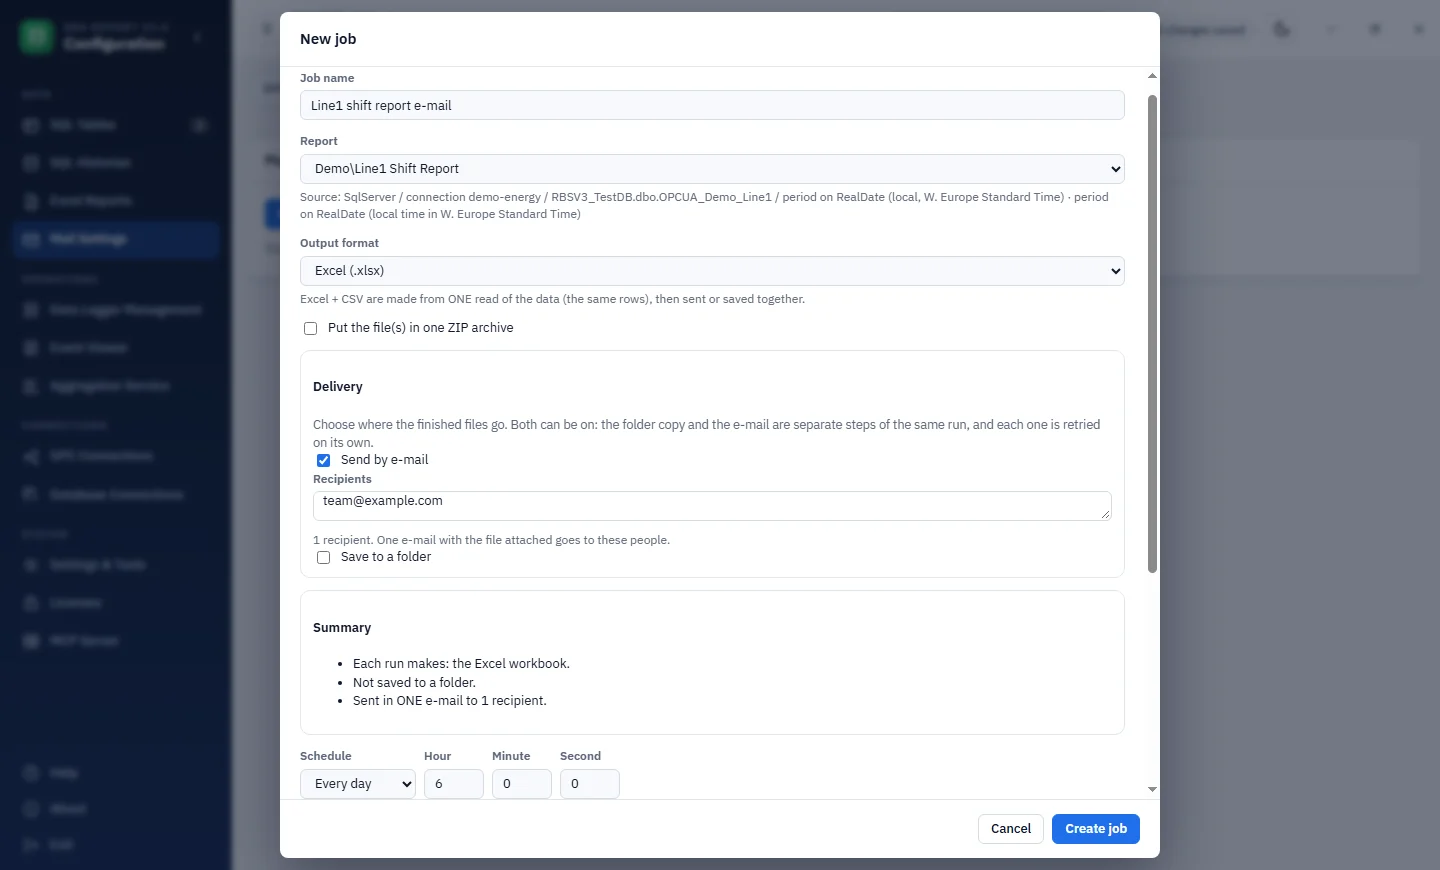
Open the Mail jobs tab and select New job. Give the job a name and pick the report. The form then shows where the data comes from and which column sets the report period.
Choose the output format: Excel (.xlsx), CSV, or both. When you pick both, the program reads the data once, so the two files hold the same rows. You can also put the files in one ZIP archive.
Under Delivery, tick Send by e-mail and enter the recipients. One email with the file attached goes to all of them. You can also tick Save to a folder. Both can be on at the same time; the email and the folder copy are separate steps of the same run, and each is retried on its own. A summary box lists what each run will make and where it goes.
4. Set the schedule
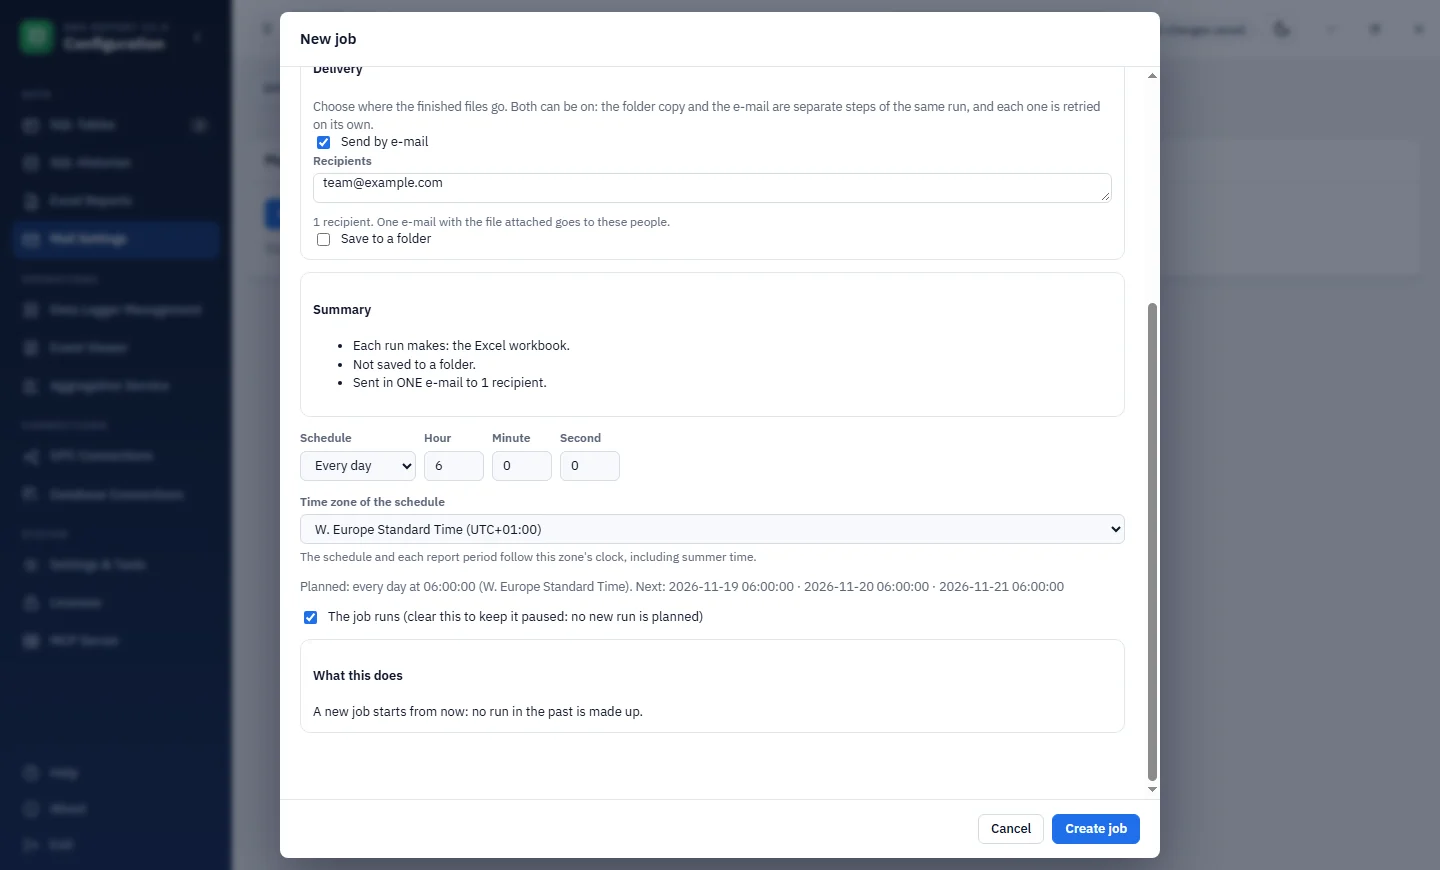
Lower in the same form, choose how often the job runs: every hour, every day, every week or every month. Enter the hour, minute and second. A weekly job also takes a day of the week, and a monthly job takes a day of the month. In our setup we chose every day at 06:00:00.
Each job has its own time zone, and the schedule and each report period follow that zone's clock, including summer time. The form shows the next three planned runs, which is a quick way to confirm the settings. In our setup they were 19, 20 and 21 November at 06:00.
The report period comes from the schedule. It is the last hour, day, week or month counted back from the planned run time, or the time from the previous planned run to this one, with no gap and no overlap. There is no free setting such as "previous shift". You can approximate a shift with an hourly or daily schedule.
If you clear The job runs, the job is saved paused and no run is planned. A new job starts from the moment you create it, and the program does not make up runs for the past. Select Create job to finish. Each job also has a Run now action, where you choose a start and an end of up to 366 days.
5. Make sure the service is running
The schedule runs in the Windows service RBSMailService. The Configuration program only sends it commands, so jobs run while Configuration and ExcelTrend are closed. They do not run while the PC is off or the service is stopped.
The service starts in a Paused state after a first install or an unclean stop. Open Mail Settings, then Service status, and select Resume execution. While it is paused, no new work starts. The same page shows the last SMTP attempt and the last error code.
If the service was down, it makes up some missed runs when it starts again, within limits: the last 6 hours for an hourly job, 3 days for a daily job, 2 weeks for a weekly job and 1 month for a monthly job. It keeps at most the last 3 runs per job and writes older ones to a single summary record.
When a send fails
The program sorts errors into temporary, permanent and blocked. After a temporary error it retries after 1, 5 and 15 minutes, then every 30 minutes. A blocked job, for example one with a missing licence, template, setting or password, is checked again every 30 minutes. In some cases the program waits for you, for example after you change the report definition or the SMTP target. You then choose Retry, Resend, Assume sent or Skip in Send history.
The logs are in C:\ProgramData\RBSReport\MailService\Logs and in the Windows Event Log. Send history and Service status are in the Configuration program under Mail Settings.
Limits to know
- Scheduled jobs send Excel, CSV or both. PDF is available only when you export by hand in ExcelTrend.
- The largest attachment is 25 MB.
- The job form has no fields for a subject line or a message text.
To see this workflow with your own data, start from the OPC UA Data Logger page, which also has the demo request.